- Obtain the target cluster info
- Add the target cluster into the Modernization Platform
- Install the add-on components for monitoring
- Create the demo project
- Assign the cluster to the demo project
- Setting-up the demo project
Obtain the target cluster info
The prerequisite tasks for registering a desired cluster on the Modernization platform are as follows. Through the tasks below, you can obtain the environment configuration and information required for registration.
# 등록할 클러스터에 접속하여 아래의 Command를 실행 합니다. $ kubectl create ns zcp-system $ kubectl create serviceaccount zcp-mcm-backend-service-admin -n zcp-system $ kubectl label sa zcp-mcm-backend-service-admin -n zcp-system zcp-mcm-default=true $ kubectl create clusterrolebinding zcp-mcm-backend-service-admin \    --clusterrole cluster-admin \    --serviceaccount zcp-system:zcp-mcm-backend-service-admin $ kubectl label clusterrolebinding zcp-mcm-backend-service-admin zcp-mcm-default=true
CLUSTER_APISERVER=$(kubectl config view --minify | grep server | cut -f 2- -d ":" | tr -d " ") CLUSTER_TOKEN=$(kubectl describe secret -n zcp-system $(kubectl get sa zcp-mcm-backend-service-admin -n zcp-system -o jsonpath='{range .secrets[*]}{.name}{"\n"}' | grep zcp-mcm-backend-service-admin-token) | grep -E '^token' | cut -f2 -d':' | tr -d " ") echo "-----------------------------" echo "CLUSTER_APISERVER :: " $CLUSTER_APISERVER echo "CLUSTER_TOKEN :: " $CLUSTER_TOKEN
Add the target cluster into the Modernization Platform
Select the type of provider you want to install in Cluster Provider and set the desired Cluster Name. Then, enter the Cluster API Server and Token information obtained through the previous process and click the Attach button to register the Cluster.
Install the add-on components for monitoring
Fluent-bit
Select the version and click save to install.
2. Fluentd
If you select the latest version for Version, a window will open where you can write the parameters required for installation.
At this time, write each value by referring to the table below and click Save to install.

3. Ingress-nginx
After you enter the desired Name and select the Version, a window will open where you can enter the Parameters required for installation. The Parameters are set to default values. Modify them if necessary and click Save to install.
4. Prometheus
Select the latest version and click save to install.
5. Prometheus-blackbox-exporter
After entering the desired Name, select the Version and click Save to install.
6. prometheus-k8s-events-exporter
After entering the desired Name, select the Version and click Save to install.
Create the demo project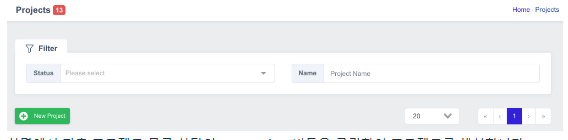
Create a project by clicking the New Project button at the top of the project list on the left side of the screen.
Enter the values required to create a project and click the Save button to create a project. The key is the unique name of the project, and the display name is the name shown on the screen. After installation, the project is in REQUESTED status, but after assigning a cluster, change the status.
Assign the cluster to the demo project
Assign a registered cluster to a project. From the project's Overview screen, navigate to the Clusters tab.
To register a cluster, click the Manage Cluster button on the top left, and a list of clusters that can be registered will be displayed.
Select the checkbox for the cluster you want to register, and click the Save button to save.

If you save, you can check the registered cluster list.
And change the status in the project overview.
 After you have finished changing the values, click the Save button to save them.
Setting-up the demo project
Project Members
Click “Go project Dashboard” to enter the dashboard for that project.
In the Administrator Members menu at the bottom left, configure the Members who will have access to the project.
Once you enter the Members menu, you can configure members through invite in the upper right corner, and add the cloudzcp-admin account and cicd-manager members.
Project Settings
Once the project members configuration is complete, configure the tools to be used in the project settings menu. You can set the endpoints specified for each type.
Online consultation
Contact us